The following tutorial covers changing of Flow Theme top rotating image on a Plone 3 website. This functionality was changed in Plone 4, instructions for updating them in Plone 4 - see in How to replace Flow Theme top image in Plone 4 tutorial.
Front page of Plone 3 site with Quintagroup's Plone Flow Skin installed will approximately look the following way with a big (434*288 pixels) image on the top area.

Other pages also have images on top area, but they are smaller - above 230*160 pixels sized.

Images on all pages rotate randomly with every page refresh. There are five images that alternate on the front page, and seven for inner pages set by default.
There are two ways of editing these images: via ZMI and via file system.
1. Image editing via Zope Management Interface
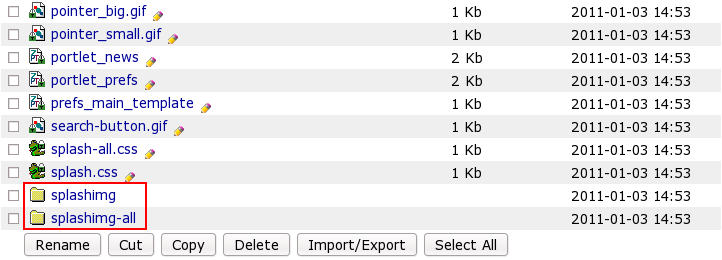
To reach those images - go to ZMI interface, open portal_skins -> qploneskinflow. The last two items in a list of qploneskinflow contents would be two folders - splashimg andsplashimg-all. splashimg contains images that are set for rotation on the front page of the site, splashimg-all contains those images that rotate on inner pages.

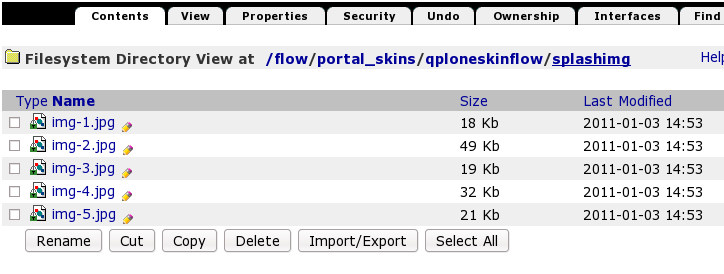
Let's select splashing, for example, and we'll see 5 images here - those, that are displayed on the top of the home page.

You can select any image to see the whole information about it, including its Id, dimension, size, modification date:

You can go to splashimg-all folder to see the rest images.
In case you want to set your own images to be displayed in this skin, you should return two levels up to portal_skins. Select custom folder.

There are currently no items in it. As we want to add some images to the front page rotation, we, at first, should add a folder. Thus, select Folder from Add drop-down menu items:

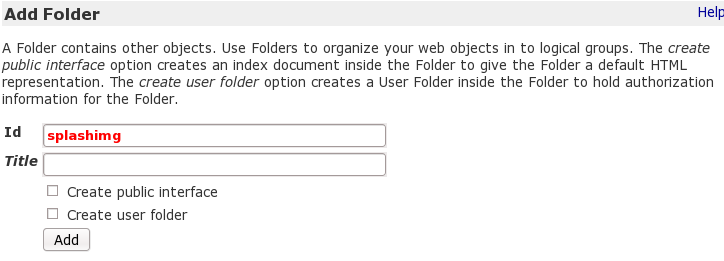
Type new folder's Id - it must be the same folder Id that are in qploneskinflow folder, either splashimg or splashimg-all. Let's at first add folder splashimg, so that to add images for the front page. Press Add button.

As a result, now we have splashimg folder in custom. Click its name to get to its content:

There are no items yet, as it has just been created. Here we'll put images we want to see on the front page. Select Image from Add drop-down menu:

Give Id to the image. Let's put image1. You can also give it a Title. Then press Browse button to find the image you are want to upload here. After that click Add button:

Now we have one image in splashimg folder, i.e. as this is the only image in this folder, only it will be displayed on the front page. If you need more - add more images - as many as you need. The number of images that can rotate on the front page is not limited, you can set as many images as you need.

Now when you return to Plone interface, you'll see images, you've just uploaded to splashimg folder, on the front page.
Images Size
Note that image dimensions are limited: front page images should be 434*288 pixels, inner pages images dimension is 230*160 pixels. If you select images of such dimensions, they will suit appropriately to Flow skin look:

If you select smaller images they will be displayed, but the view will not be very nice, some space will not be filled with image

In case the larger image is added, it will be displayed either partially, or cover more space:

So, try to upload images of the right size, so that not to break Flow skin view.
Images for inner pages
To set images for inner pages - add folder splashimg-all to custom folder (in the same way as you did with splashimg). Add necessary images into it. Remember about image dimension - images for inner pages should be 230*160 pixels. The number of images for inner pages rotation is not limited as well as for the front page.
2. Image editing via File System
In Windows this task can be carried out with the help of WinSCP program, in Linux - with Krusader program. Login to your Quintagroup Plone Hosting account. (In case you do not know how to connect to your account, follow description from Plone Products Installation in Linux and How To Install Plone Products (in Windows) up to the moment you get to Products folder.
Open qPloneSkinFlow -> skins -> qploneskinflow. There are 2 folders inside - splashimg and splashimg-all. splashimg contains images that are set for rotation on the front page of the site, splashimg-all contains those images that rotate on inner pages.

Select splashing and you will see 5 images here - those, that are displayed on the top of the home page.

In case you want to set your own images to be displayed in this skin, replace images from splashimg and splashimg-all with your own. Note that image dimensions are limited: front page images should be 434*288 pixels, inner pages images dimension is 230*60 pixels. If you select images of such dimensions, they will suit appropriately to Flow skin look, if you select smaller or larger images they will be displayed, but the view will not be very nice. So, try to upload images of the right size, so that not to break Flow skin view.
After you have copied the necessary images into splashimg and splashimg-all folders, restart server so that changes are applied. Now when you get back to Plone interface you will see your new images.
