Uni Plone Theme has special blue-colored style for static stylish portlet (1 and 2) and grey-background style for static portlet images (3, 4, and 5). You will not see those portlets right after theme activation, but you can assign such portlets to your site by following the instructions below.
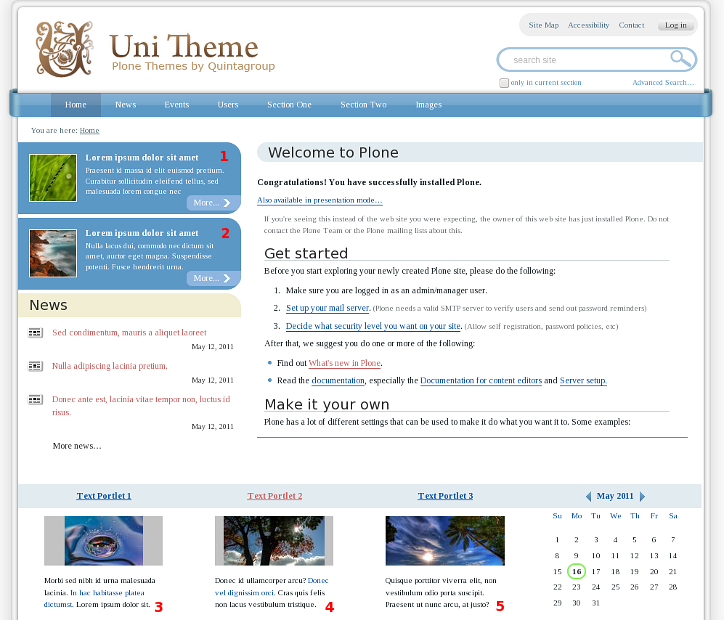
Static Text Portlets with Images
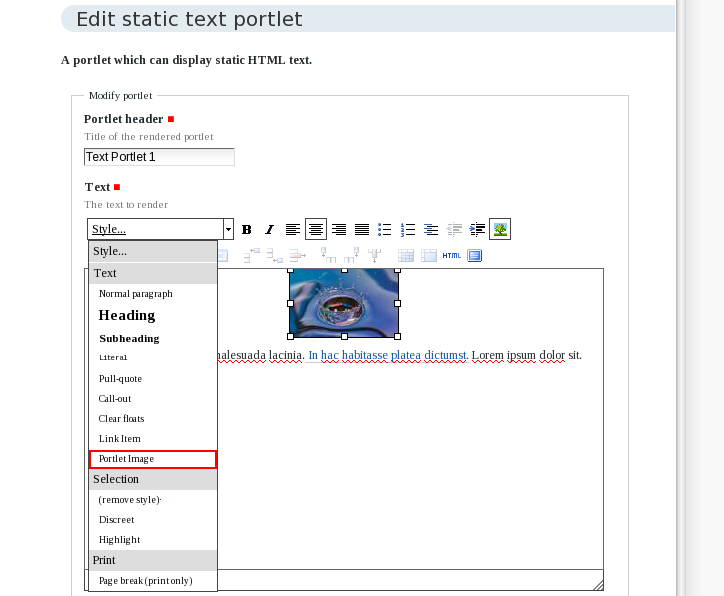
You can place default Plone static text portlets into the second portlet column below site main content area. Such portlets can include images of different sizes. To make such porltets look nice - we suggest using grey background for images, so that all images have the same width. To add such grey backgrounds - on the portlet edit form - add image and assign Portlet Image style for it:
Blue-colored Static Stylish Portlets
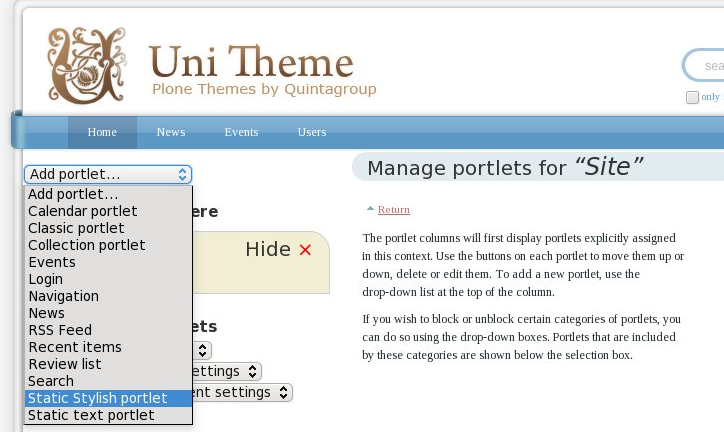
Uni Plone Theme has special style for static stylish portlets. To add such portlets - you have to install quintagroup.portlet.static first. Then, from the list of available porltet types - select 'Static Stylish Portlet':
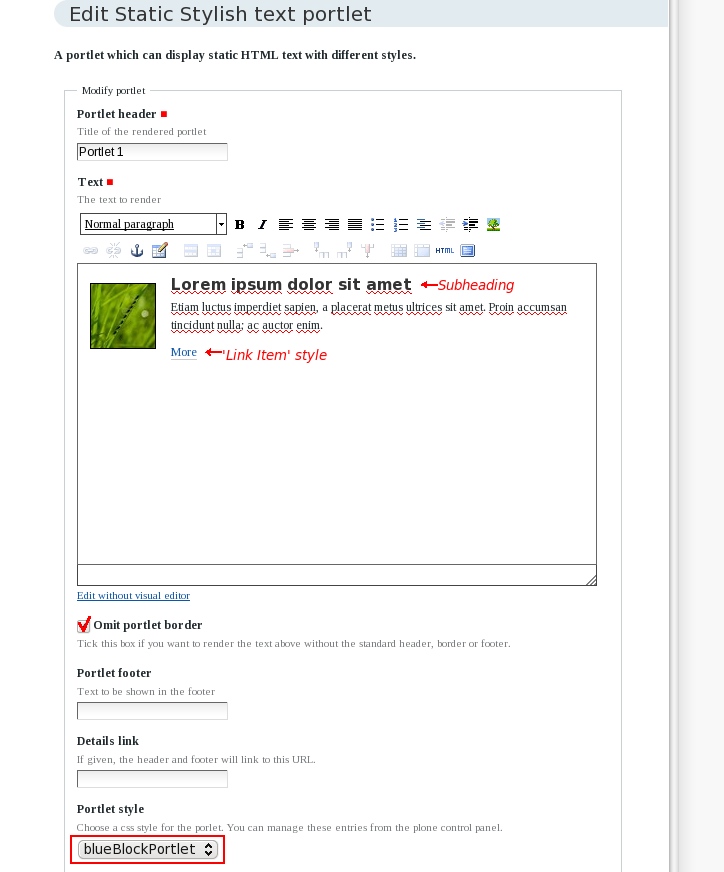
In the opened screen - provide portlet main text:
- insert left-aligned image
- add portlet header as Subheading
- Assign 'Link Item' style for 'more' link
Also, enable Omit portlet border option, and select blueBlockPortlet portlet style:
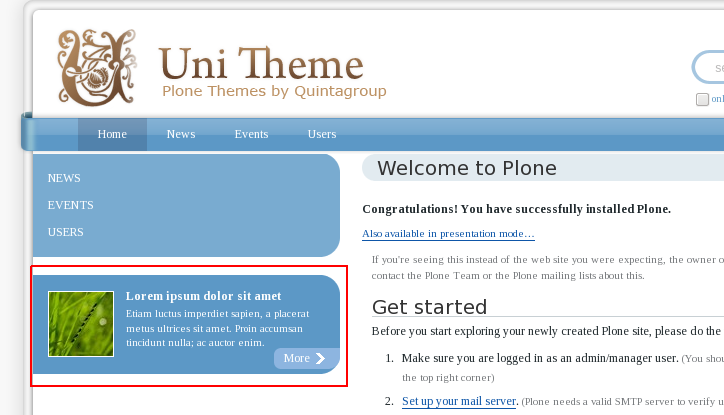
Save this portlet. As a result - you will get nice blue portlet in the left portlet column:
