This tutorial covers customization of Uni Plone Theme on Plone 4 websites.For diazo Uni Plone theme customization - see Diazo Uni Plone Theme in Plone 4.1 tutorial.
Uni Theme changes default Plone look using tableless layout. It comes with replaceable logo, customizable columns width, custom icons for news and events portlets, special blue-colored style for static stylish portlet, grey-background style for static portlet images. This Plone tutorial consists of several parts, in which you will find explanations about how to customize Uni Plone Theme to your needs. Use the navigation on the right to navigate through all tutorial sections.
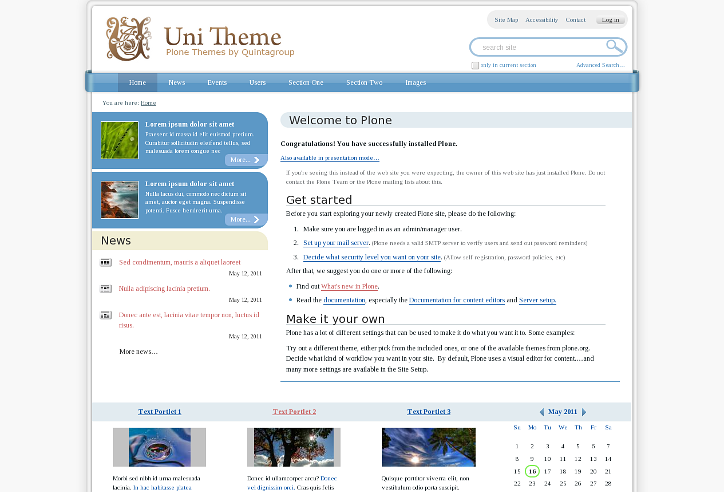
The following screenshot demonstrates you a front page of a typical Plone site with Quintagroup's Plone Uni Theme installed. Newly-created Plone site with Uni Plone Theme will have more modest look (see screenshots in this tutorial sections).

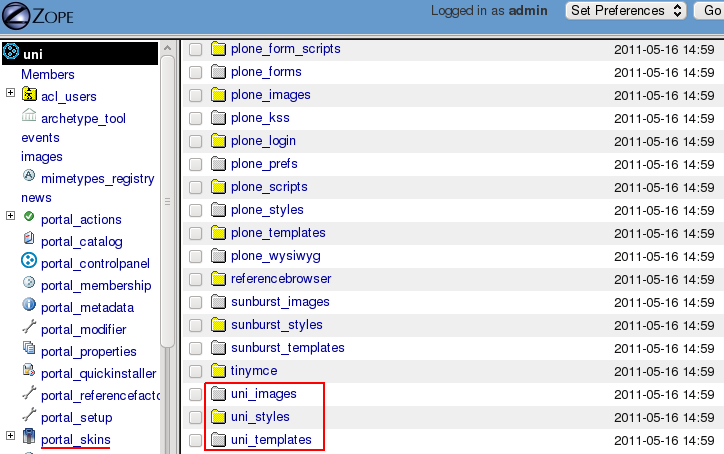
All the changes in Uni Plone Theme can be done via Zope Management Interface. ZMI can be reached by adding /manage to site URL. In the left navigation menu select portal_skins. Then select either uni_images, uni_styles, or uni_templates among portal_skins content items. These are folders where all the following changes will take place.

Important Note
In case can't see changes you have done to the theme instantly, this means that CSS styles remained cached and should be reloaded. For that - go to ZMI -> portal_css (Registry of CSS files):

Check Development mode and make sure the page is loaded completely when you are saving debug mode, otherwise some css styles may be lost and save changes.
In case you notice that after debug mode turned on your website slowed down, get back to portal_css and uncheck debug mode.

