First of all, the most recommended way is upload of whole database (data.fs file). However, in some situations below tutorial may help you.
Important notice: you should have to install at target Zope instance the same version of Plone, Zope, Zope products which you have on your local Zope instance.
.zexp export can be carried out with the help of WinSCP program. As soon as you have this program downloaded, you can start export. To begin, you've got to log in to Quintagroup Plone Hosting account in the way provided below:
How to Make .zexp Export of a Plone Site
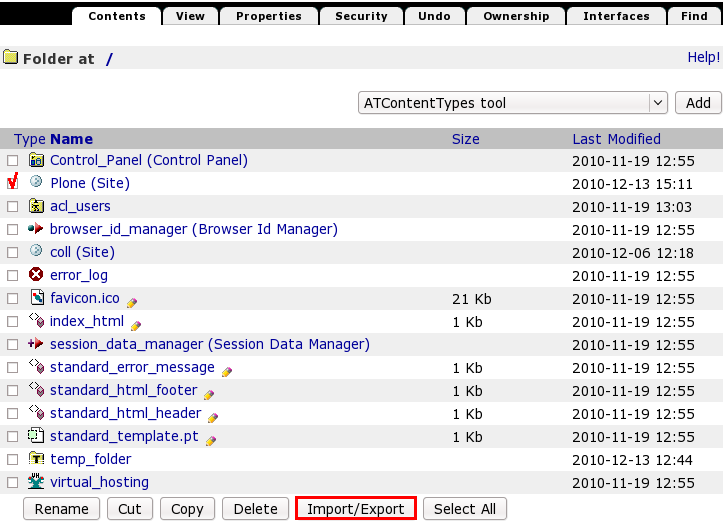
Suppose your site is located at http://localhost:8080/Plone.Go to its ZMI http://localhost:8080/manage. To export local Plone site you have to select it (the Plone object) in ZMI and press Import/Export button.

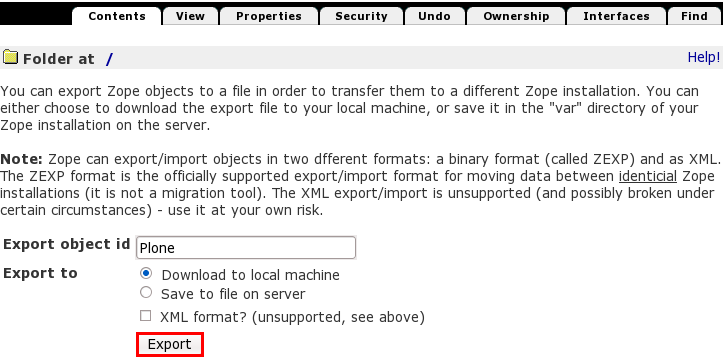
Don't change the id. Select Download to local machine. Click Export button and save *.zexp file to local computer. If your site id is Plone then the filename should be Plone.zexp file.

How to Make .zexp Import of a Plone Site
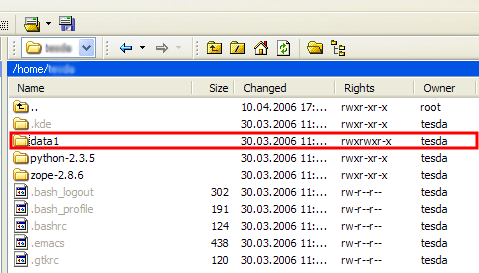
First you need to access your Zope Instance with SSH Login/Password and open data1 folder

Open the folder import (in ordinary instances it is located directly under data1 -> import, in instances created with buildout - data1 -> parts -> instance -> import), find .zexp file in the left column of WinSCP. Copy .zexp file to the Import folder of your instance (right column) via drag-and-drop.
Go to the ZMI root of Quintagroup hosting e.g. http://username.quintagroup.com/manage. Click Import/Export button to Import .zexp file.
