Building two-level navigation is easy. Follow simple steps and organize the structure of your website.
1. Go to the root of your website, click on Contents tab.
2. Choose Add new -> Folder from the green drop-down menu.
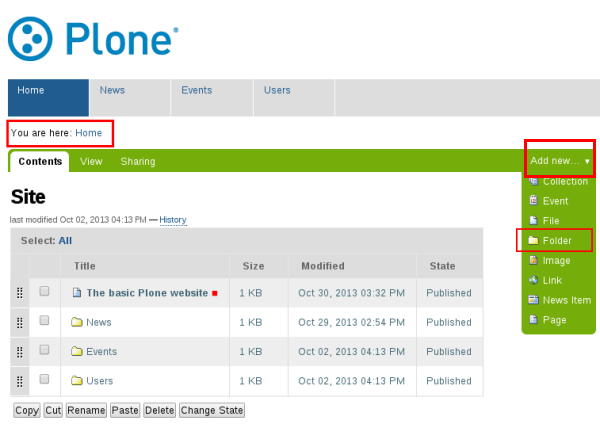
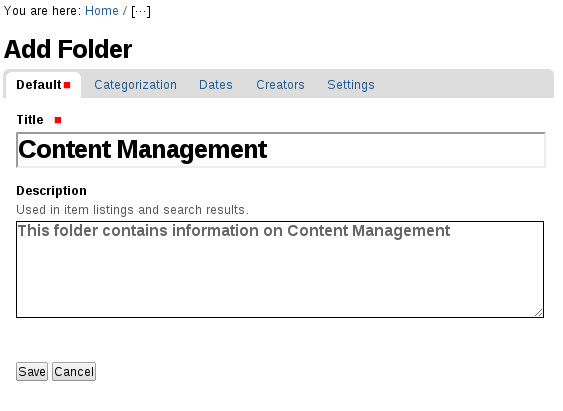
3. Insert Title, description and save new folder.
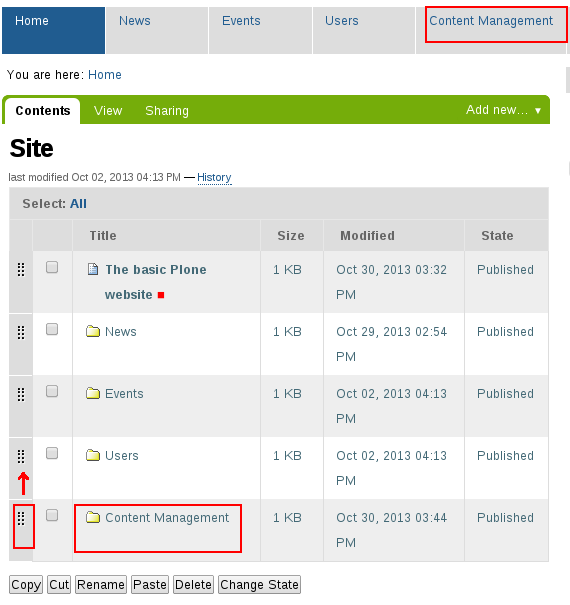
4. Our new folder is called ‘Content Management’. It is displayed in the website root contents and in Navigation Tabs. You can change folder position moving it between others
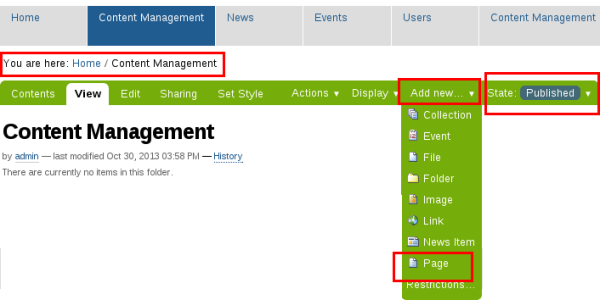
5. Go to the folder you want to add content to. In our case it is ‘Content Management’ folder. Use Contents or View tab.
You can change state of your folder for Published if you want folder to be visible for visitors, or leave it in Private state if it needs further editing.
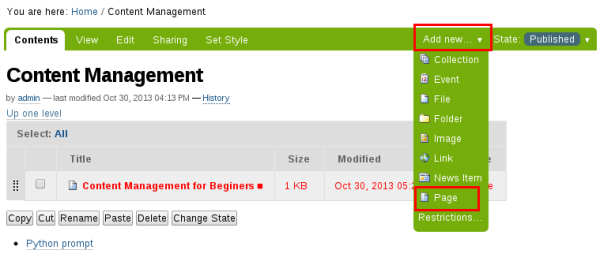
To add new page to the folder click on Add new and select Page from green drop-down menu.
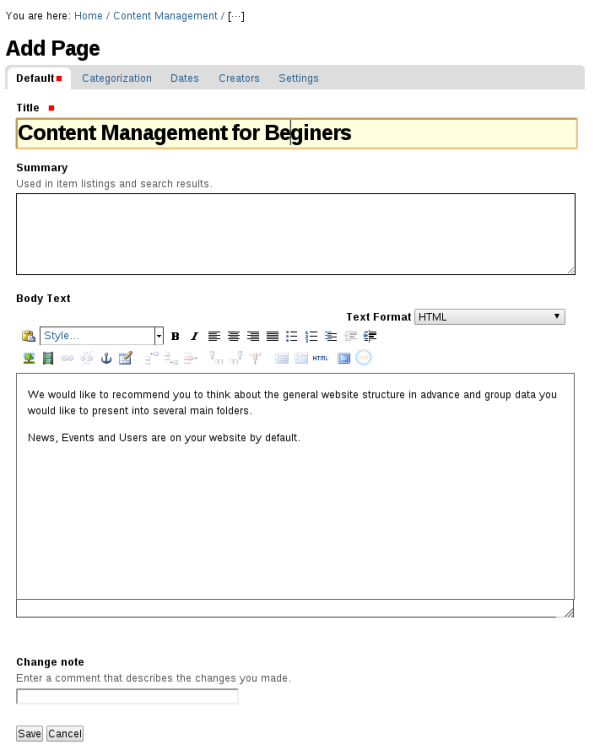
6. Insert content. TinyMCE is default WYSIWYG editor. It is intuitive and doesn’t require HTML knowledge.
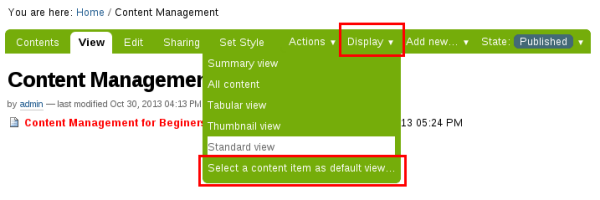
7. To make this page default view of 'Content Management' folder go to folder’s View tab. Choose Display on the panel, then ‘Select a content item as default view’ from green drop-down menu.
Choose page you would like to be default for the folder and click Save.
8. Add other content.
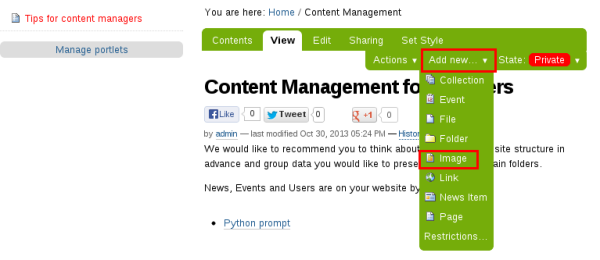
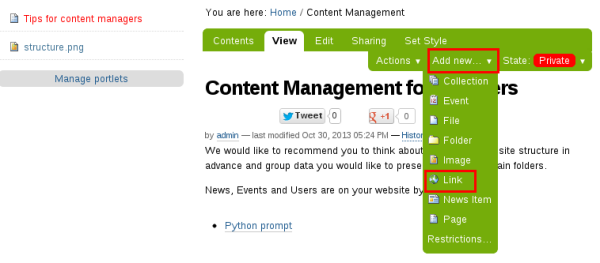
Go to the Contents or View tab of your folder. Click on Add new and choose necessary content type, e.g.:
a) Page (see №6)
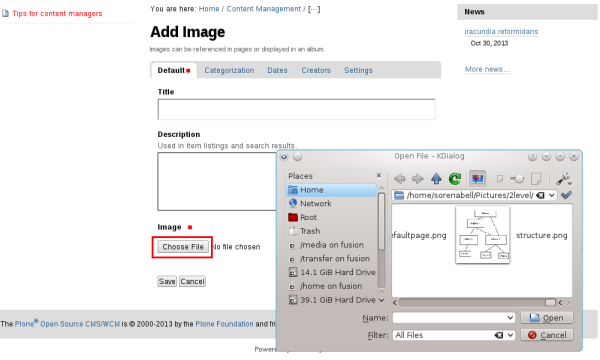
b) Image
Enter image Title and click on Choose file to select an item from your local computer.
c) Link
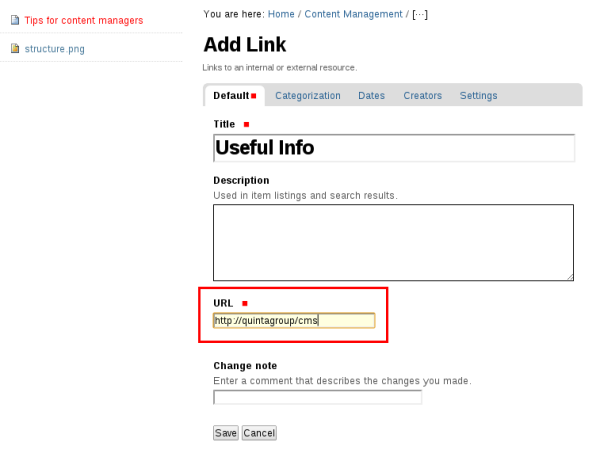
Insert Title and URL. Click Save.
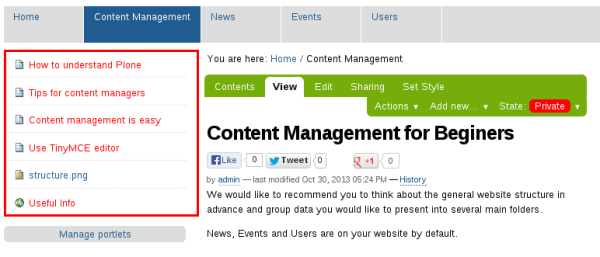
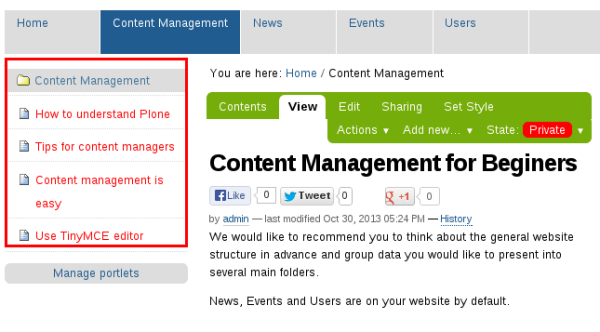
9. After adding of each content item you can see it in Navigation portlet.
10. If you want to display the name of the Folder you are currently in, add /@@manage-portlets to your website’s URL. Click on Navigation among the portlets displayed on the left side of the page.
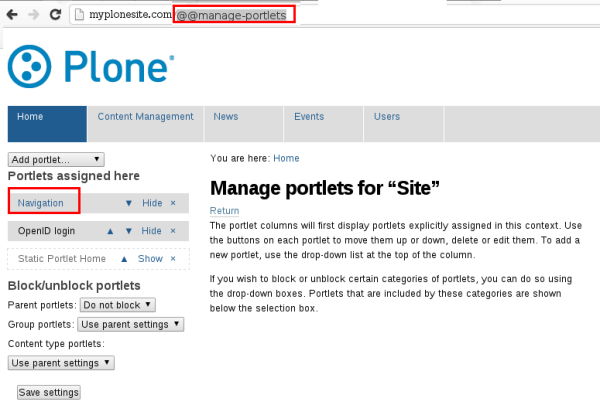
11. Tick the Include top node checkbox and save changes.
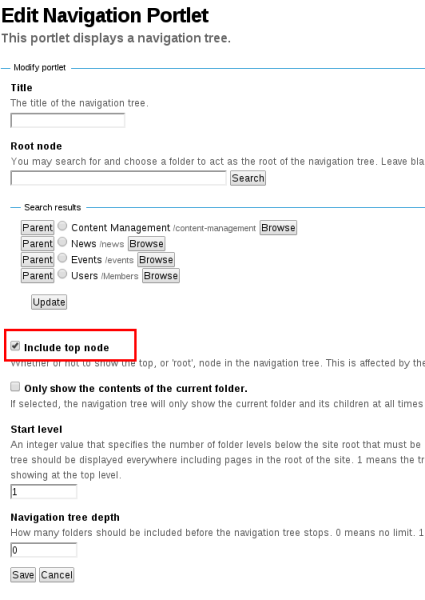
12. Now the top folder your contents is in is displayed.
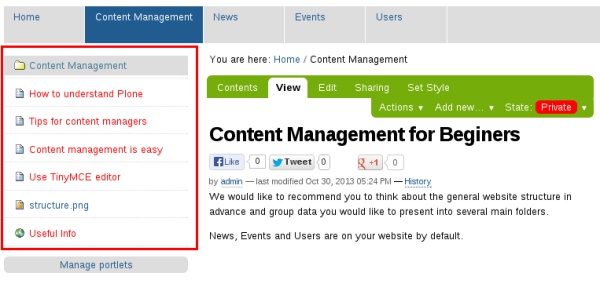
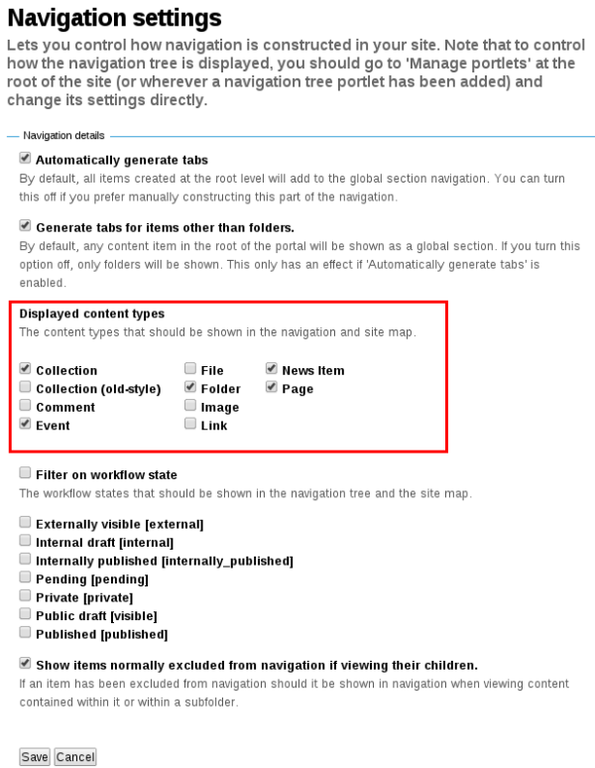
13. As you can see, all content types are displayed in Navigation portlet. To change this:
- go to your login name in the upper right corner of the window and choose Site setup from b) Imagedrop-down menu;
- select Navigation;
- tick only those content type you want to be displayed.
We recommend to remove Image, File, and Link content types from navigation, so that they are invisible to the visitors.
14. Your two-level navigation is ready.
Remember to publish your content after editing so it would be visible for visitors of your website.
