There are several ways to customize the CSS styles in Diazo themes.
First of all, check if Diazo theme support is activated. Go to Site Setup - > Add-ons and search for 'Diazo theme support'. Activate it, if it is not activated already.
There two possible options:
- Download zip file, edit it locally on your computer and upload modified theme in the form of zip file.
- Copy Diazo theme and edit it online.
Download theme zip folder
To use this way follow the steps:
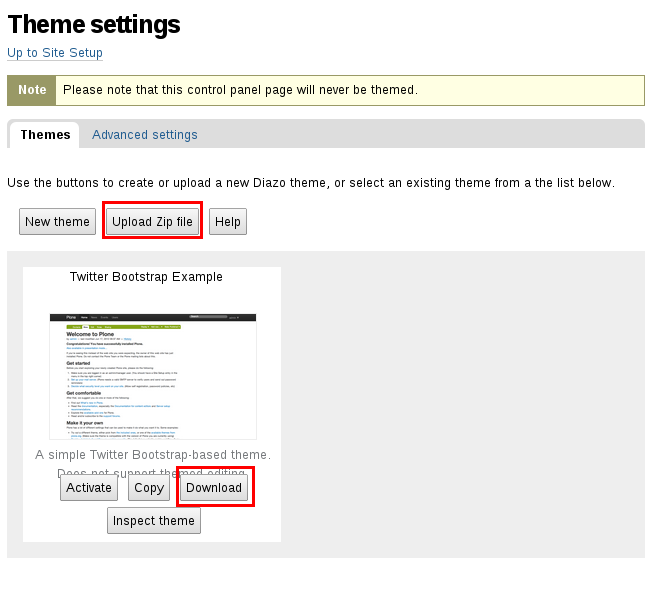
- Go to Site setup - > Theming. There you can see all available themes.
- Each theme has 'Download' button. Click it and downloading of the theme’s zip file will start immediately.
- Extract theme folder and change styling locally.
- After saving new configurations compress theme folder to the *.zip format.
- On the Theme settings choose ‘Upload Zip file’ and select your newly edited Diazo theme, it will appear in the list of available themes.
- Click on the ‘Activate’ button and this Diazo theme will be used for your Plone website.

Edit Diazo theme online
To perform this operation follow the steps:
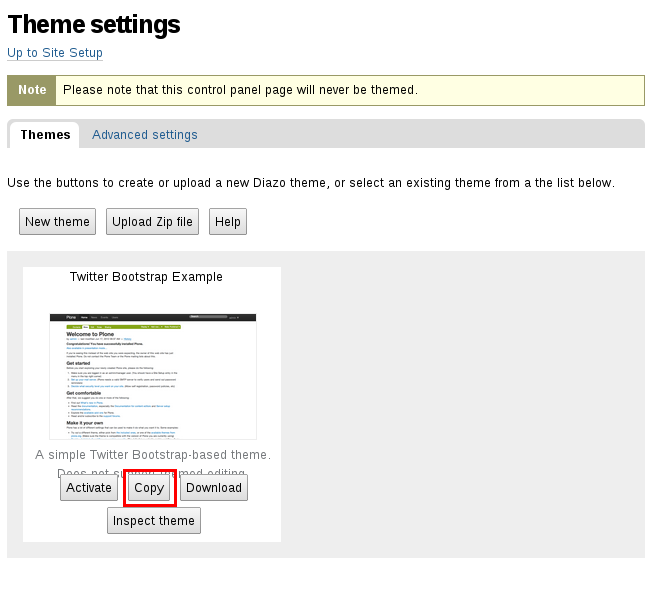
1. Go to Site setup - > Theming.
2. All available themes have ‘Copy’ button. Click it on the desired Diazo theme and it will automatically be copied.

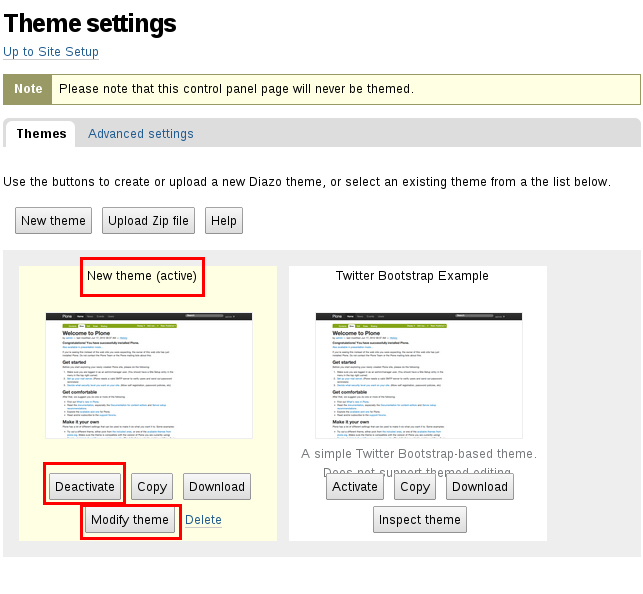
3. Give title and description to the new theme and choose whether to activate it immediately.
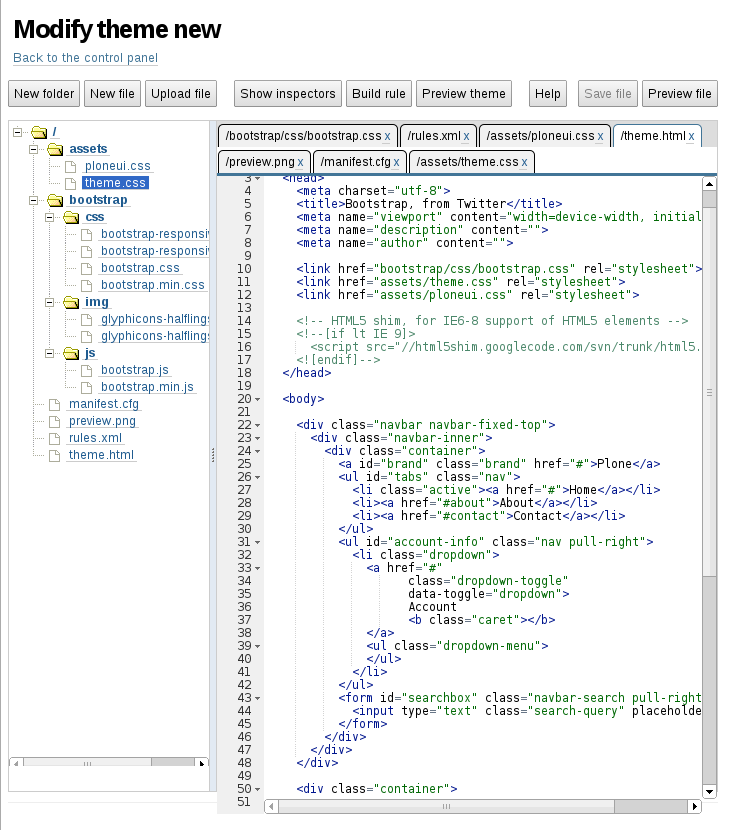
4. New theme will have ‘Modify theme’ button. Click it and you will be redirected to the theme editor.

5. In the editor you can add new file, folder, new rules and make any other changes you’d like.

6. To see the changes save them and click 'Preview theme’ if it is not active, or go directly to the website if it is.
There are two more ways to customize the CSS stylesheets in Diazo themes, though they may not work for all of the themes. You can use the following ways to customize themes developed by Quintagroup:
- To change CSS stylesheets, follow the instructions and install the theme in the development mode. The main files which will hold the code for the theme are in the theme package 'quintagroup/theme/theme_name/static'.
- The second method is do it via Zope Management Interface, go to Site Setup -> Zope Management Interface -> portal_css. There find ploneCustom.css, untick the box "Merging allowed?" and save changes. Then move to the portal_skins -> sunburst_styles and open ploneCustom.css file. This should bring up a window like in the screenshot below. Here you can begin the coding process.
To see your changes applied, open portal_css, select Development mode and save. Reload your page and turn off Development mode.

The tip for future references: Make sure everything validates.
